
Spring MVC Form Handling Example
Spring MVC Forms
The following tutorial will guide you on writing a simple web based application which makes use of forms using Spring Web MVC framework. I will be using Spring Tool Suite IDE but you can easily use Eclipse / NetBeans IDEs.
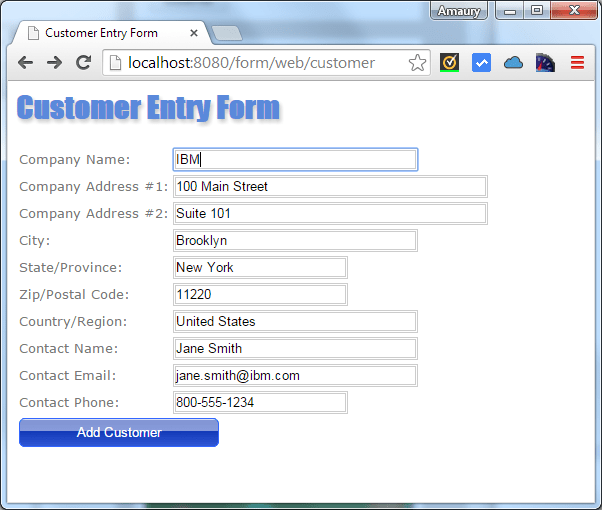
Our Completed Customer Form
With this web application you will be able to interact with the form and enter all of the required values and submit them to the backend processes. I have taken the liberty of using CSS to beautify and transform the HTML page from a standard drab look and feel to a more appealing view. I hope you like the changes.
Project Explorer Structure
I am showing you the Project Explorer View to help you visualize how the project is organized.

Customer Model Class
Next we create a model class called Customer.java which will hold all of the values coming from the users entry via the Customer Entry Form. Note: For the purpose of brevity, I have omitted all of the getters/setters and the toString() method.
package com.avaldes.model;

public class Customer {
  private String companyName;
  private String companyAddress1;
  private String companyAddress2;
  private String city;
  private String state;
  private String zip;
  private String country;
  private String email;
  private String contactName;
  private String contactPhone;

  // Getters and Setters...
}
Customer Controller Class (CustomerController.java)
For this controller class (annotated with @Controller) you will notice that we created the class and added two methods. The customer() service method has been annotated with @RequestMapping with value of /customer and method of RequestMethod.GET. This method will be called with the website hits the URL with /customer. For this method we will be passing a newly created Customer object which is blank to the command object that Spring uses. The command object is a JavaBean which which is populated with the data from your forms — in this case we populate it with blank data. Since we are returning “customer” via the new ModelAndView object it will call the customer.jsp view.
Next we have another service method called addCustomer() which has been annotated with @RequestMapping with value of /addCustomer and method of RequestMethod.POST. For this method we are using @ModelAttribute which will alleviate us from having to perform the marshalling and unmarshalling of data had we used @RequestParam, in addition, @ModelAttribute will populate all the Customer’s variables from the values coming from the Customer Entry Form. We will then populate the command object with customer instance so that we call pull the values from the object when we display the values in the show.jsp view.
Note
For this example, we have modified the context root of the application hitting Alt + Enter which will bring up the Properties dialog window. Next, you would go Web Project Settings and choose the context root you want for your project. In this project the context root is form.
In addition, because the web server is also serving styles.css and png files for visual impact I needed to modify the servlet-mapping in the web.xml.
<servlet-mapping>
  <servlet-name>appServlet</servlet-name>
  <url-pattern>/web/*</url-pattern>
</servlet-mapping>
package com.avaldes.tutorial;

import org.slf4j.Logger;
import org.slf4j.LoggerFactory;
import org.springframework.stereotype.Controller;
import org.springframework.ui.Model;
import org.springframework.web.bind.annotation.ModelAttribute;
import org.springframework.web.bind.annotation.RequestMapping;
import org.springframework.web.bind.annotation.RequestMethod;
import org.springframework.web.servlet.ModelAndView;

import com.avaldes.model.Customer;

/**
 * Handles requests for the application customer pages.
 */
@Controller
public class CustomerController {

  private static final Logger logger =
                              LoggerFactory.getLogger(CustomerController.class);

  @RequestMapping(value = "/customer", method = RequestMethod.GET)
  public ModelAndView customer() {
      return new ModelAndView("customer", "command", new Customer());
   }

  @RequestMapping(value = "/addCustomer", method = RequestMethod.POST)
  public String addCustomer(@ModelAttribute("customer") Customer customer,
                                                               Model model) {

    if (customer != null) {
      logger.info("Inside addCustomer, adding: " + customer.toString());
    } else {
      logger.info("Error addCustomer...");
    }

    // Add the customer object to the Model
    model.addAttribute("customer", customer);
    return "show";
  }
}
The Views (customer.jsp)
This file is one of the two view files used in this project. This file is used to generate the Customer Entry Form and is where user input is captured.
<%@ taglib uri="http://www.springframework.org/tags/form" prefix="f" %>
<html>
  <head>
    <title>Customer Entry Form</title>
    <link rel="stylesheet" href="/form/include/styles.css">
  </head>
  <body>
      <h1>Customer Entry Form</h1>
    <f:form method="POST" action="/form/web/addCustomer">
    <table>
      <tbody>
        <tr>
          <td><f:label path="companyName">Company Name:</f:label></td>
          <td><f:input path="companyName" size="30" maxlength="30"></f:input></td>
        </tr>
        <tr>
          <td><f:label path="companyAddress1">Company Address #1:</f:label></td>
          <td><f:input path="companyAddress1" size="40"></f:input></td>
        </tr>
        <tr>
          <td><f:label path="companyAddress2">Company Address #2:</f:label></td>
          <td><f:input path="companyAddress2" size="40"></f:input></td>
        </tr>
        <tr>
          <td><f:label path="city">City:</f:label></td>
          <td><f:input path="city" size="30"></f:input></td>
        </tr>
        <tr>
          <td><f:label path="state">State/Province:</f:label></td>
          <td><f:input path="state" size="20"></f:input></td>
        </tr>
        <tr>
          <td><f:label path="zip">Zip/Postal Code:</f:label></td>
          <td><f:input path="zip" size="20"></f:input></td>
        </tr>
        <tr>
          <td><f:label path="country">Country/Region:</f:label></td>
          <td><f:input path="country" size="30"></f:input></td>
        </tr>
        <tr>
          <td><f:label path="contactName">Contact Name:</f:label></td>
          <td><f:input path="contactName" size="30"></f:input></td>
        </tr>
        <tr>
          <td><f:label path="email">Contact Email:</f:label></td>
          <td><f:input path="email" size="30"></f:input></td>
        </tr>
        <tr>
          <td><f:label path="contactPhone">Contact Phone:</f:label></td>
          <td><f:input path="contactPhone" size="20"></f:input></td>
        </tr>
        <tr>
          <td colspan="2"><input type="submit" value="Add Customer" class="button"></td>
         </tr>
      </tbody>
    </table>
    </f:form>
  </body>
</html>
The Other View (show.jsp)
This view is used to display the submitted customer information that has been entered by our user. The most important point about this form is the use of the syntax ${customer.XXXX}. We are pulling the customer object from the command object using EL expressions to display values of properties of the customer object in the model.
<%@ taglib uri="http://www.springframework.org/tags/form" prefix="f" %>
<html>
  <head>
    <title>Submitted Customer Information</title>
    <link rel="stylesheet" href="/form/include/styles.css">
  </head>
  <body>
      <h1>Submitted Customer Information</h1>
    <table>
      <tbody>
        <tr>
          <td class="display">Company Name:</td>
          <td class="display_bold">${customer.companyName}</td>
        </tr>
        <tr>
          <td class="display">Company Address #1:</td>
          <td class="display_bold">${customer.companyAddress1}</td>
        </tr>
        <tr>
          <td class="display">Company Address #2:</td>
          <td class="display_bold">${customer.companyAddress2}</td>
        </tr>
        <tr>
          <td class="display">City:</td>
          <td class="display_bold">${customer.city}</td>
        </tr>
        <tr>
          <td class="display">State/Province:</td>
          <td class="display_bold">${customer.state}</td>
        </tr>
        <tr>
          <td class="display">Zip/Postal Code:</td>
          <td class="display_bold">${customer.zip}</td>
        </tr>
        <tr>
          <td class="display">Country/Region:</td>
          <td class="display_bold">${customer.country}</td>
        </tr>
        <tr>
          <td class="display">Contact Name:</td>
          <td class="display_bold">${customer.contactName}</td>
        </tr>
        <tr>
          <td class="display">Contact Email:</td>
          <td class="display_bold">${customer.email}</td>
        </tr>
        <tr>
          <td class="display">Contact Phone:</td>
          <td class="display_bold">${customer.contactPhone}</td>
        </tr>
      </tbody>
    </table>
  </body>
</html>
Submitted Customer Information Form

Cascading Style Sheet (CSS)
We are using this CSS in order to make both the Customer Entry Form and the Submitted Customer Information forms more visually appealing to end users. If, for whatever reason, you choose not the use this, please remove this style.css file and then remove the HTML tag < link rel=’stylesheet’ href=’/form/include/styles.css’ > from the corresponding *.jsp files.
Graphic Resources (PNG files)
blue_button.png 
blue_button_hover.png 
CSS (styles.css)
/* Change color of H1 tag and add Shadow */
h1 {
  font-family: impact, sans-serif;
  font-size: 30px;
  color: #5A89DB;
  font-style: bold;
  text-align: left;
  text-shadow: 2px 3px 5px #CCC;
}

/* Label Style */
.display {
  font-family: verdana, sans-serif;
  font-size: 13px;
  color: #777;
}

.display_bold {
  font-family: verdana, sans-serif;
  font-size: 13px;
  font-weight: bold;
  color: #555;
}

/* Label Style */
label {
  font-family: verdana, sans-serif;
  font-size: 13px;
  color: #777;
}

/* Double Border */
input {
  border: 3px double #CCCCCC;
}

/* Submit Button with Hover Effect*/
.button {
  background-color: #3366FF;
  padding-left:20px;
  padding-right:20px;
  padding-top:6px;
  padding-bottom:6px;
  border-radius: 6px;
  color: #ffffff;
  width: 200px;
  border:1px solid #3366FF;;
  background-image: url(/form/images/blue_button.png);
}

.button:hover {
  background-color: #000000;
  border:1px solid #000000;
  background-image: url(/form/images/blue_button_hover.png);
}
Configure DispatcherServlet (web.xml)
<?xml version="1.0" encoding="UTF-8"?>
<web-app version="2.5" xmlns="http://java.sun.com/xml/ns/javaee"
  xmlns:xsi="http://www.w3.org/2001/XMLSchema-instance"
  xsi:schemaLocation="http://java.sun.com/xml/ns/javaee http://java.sun.com/xml/ns/javaee/web-app_2_5.xsd">

  <!-- The definition of the Root Spring Container shared by all Servlets and Filters -->
  <context-param>
    <param-name>contextConfigLocation</param-name>
    <param-value>/WEB-INF/spring/root-context.xml</param-value>
  </context-param>

  <welcome-file-list>
      <welcome-file>customer.jsp</welcome-file>
  </welcome-file-list>

  <!-- Creates the Spring Container shared by all Servlets and Filters -->
  <listener>
    <listener-class>org.springframework.web.context.ContextLoaderListener</listener-class>
  </listener>

  <!-- Processes application requests -->
  <servlet>
    <servlet-name>appServlet</servlet-name>
    <servlet-class>org.springframework.web.servlet.DispatcherServlet</servlet-class>
    <init-param>
      <param-name>contextConfigLocation</param-name>
      <param-value>/WEB-INF/spring/appServlet/servlet-context.xml</param-value>
    </init-param>
    <load-on-startup>1</load-on-startup>
  </servlet>

  <servlet-mapping>
    <servlet-name>appServlet</servlet-name>
    <url-pattern>/web/*</url-pattern>
  </servlet-mapping>

</web-app>
Download the Code
That’s It!
I hope you enjoyed this tutorial. It was certainly a lot of fun putting it together and testing it out. Please continue to share the love and like us so that we can continue bringing you quality tutorials. Happy Coding!!!

Related Spring Posts
- Creating Hello World Application using Spring MVC on Eclipse IDE
In this tutorial we will go into some detail on how to set up your Eclipse IDE environment so that you can develop Spring MVC projects. In this post, we will create our first Spring MVC project with the all to familiar “Hello World” sample program. - Spring MVC Form Handling Example
The following tutorial will guide you on writing a simple web based application which makes use of forms using Spring Web MVC framework. With this web application you will be able to interact with the customer entry form and enter all of the required values and submit them to the backend processes. I have taken the liberty of using CSS to beautify and transform the HTML page from a standard drab look and feel to a more appealing view. - Spring @RequestHeader Annotation ExampleIn this tutorial, we will discuss the different ways that Spring MVC allow us to access HTTP headers using annotation. We will discuss how to access individual header fields from the request object as well accessing all the headers by supplying Map and then iterating through the LinkedHashMap collection. We will also show you how to set the headers in the response object.
- Spring MVC Exception Handling using @ExceptionHandler with AngularJS GUIGood exception handling is a essential part of any well developed Application Framework and Spring MVC is no exception — pardon the pun. Spring MVC provides several different ways to handle exceptions in our applications. In this tutorial, we will cover Controller Based Exception Handling using the @ExceptionHandler annotation above the method that will handle it.
- Spring RESTful Web Service Example with JSON and Jackson using Spring Tool Suite
For this example, I will be using Spring Tool Suite (STS) as it is the best integrated development environment for building the Spring framework projects. Spring is today's leading framework for building Java, Enterprise Edition (Java EE) applications. One additional feature that makes Spring MVC so appealing is that it now also supports REST (REpresentational State Transfer) for build Web Services. - Spring MVC RESTful Web Service Example with Spring Data for MongoDB and ExtJS GUI
This post will show another example of how to build a RESTful web service using Spring MVC 4.0.6, Spring Data for MongoDB 1.6.1 so that we can integrate the web application with a highly efficient datastore (MongoDB 2.6). In this tutorial we will walk you through building the web service and NoSQL database backend and show you how to implement CRUD (Create, Read, Update and Delete) operations. - Building DHTMLX Grid Panel User Interface with Spring MVC Rest and MongoDB Backend
In this tutorial we will show how easy it is to use DHTMLX dhtmlxGrid component while loading JSON data with Ajax pulling in data from the Spring MVC REST web service from our MongoDB data source. You will see how simple it is to create a visually appealing experience for your client(s) with minimal javascript coding. - Spring MVC with JNDI Datasource for DB2 on AS/400 using Tomcat
In this tutorial we will discuss how to set up Spring MVC web services and configure a JNDI Datasource using Tomcat and connect to IBM DB2 Database on a AS/400. JNDI (Java Naming and Directory Interface) provides and interface to multiple naming and directory services. - Java Spring MVC Email Example using Apache Velocity
In this tutorial we will discuss how to set up a Java Spring MVC RESTful Webservice with Email using Apache Velocity to create a Velocity template that is used to create an HTML email message and embed an image, as shown below, using MIME Multipart Message. - Implementing Basic and Advanced Search using Angular Material Design, Grid-UI, Spring MVC REST API and MongoDB Example
In this tutorial we will discuss how to implement basic and advanced search techniques in MongoDB using AngularJS and Google’s Material Design with Spring MVC REST API backend. The advanced search user interface (UI) will use logical operators and build a JSON object which contains the search field name, boolean or logical operator and the search value. - Spring MVC Interceptor using HandlerInterceptorAdapter Example
In this tutorial we will discuss how to use the HandlerInterceptorAdapter abstract class to create a Spring MVC interceptor. These interceptors are used to apply some type of processing to the requests either before, after or after the complete request has finished executing.
Leave a Reply